the bits that didn’t make the FrankenGAN paper: using GANs in practice (now we’re conditionally accepted to siga this year):
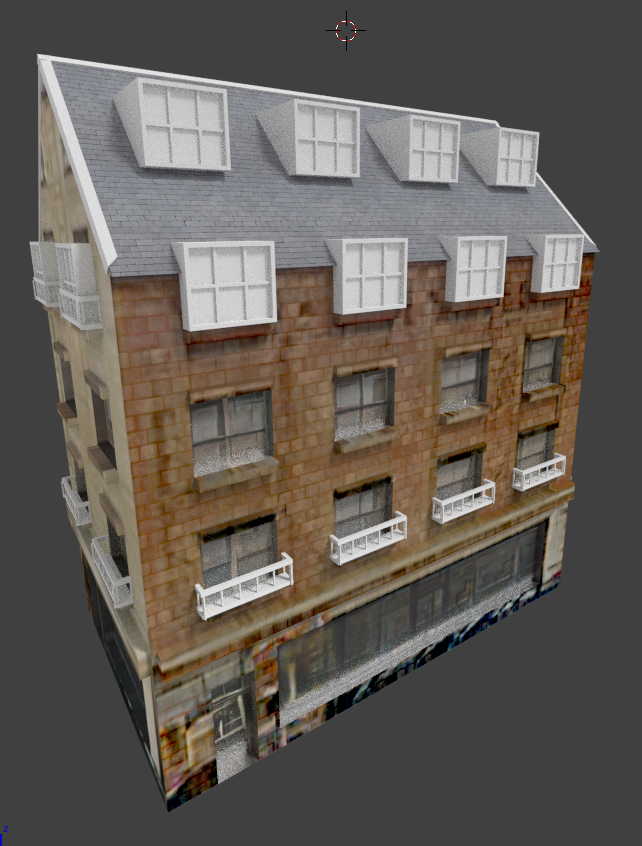
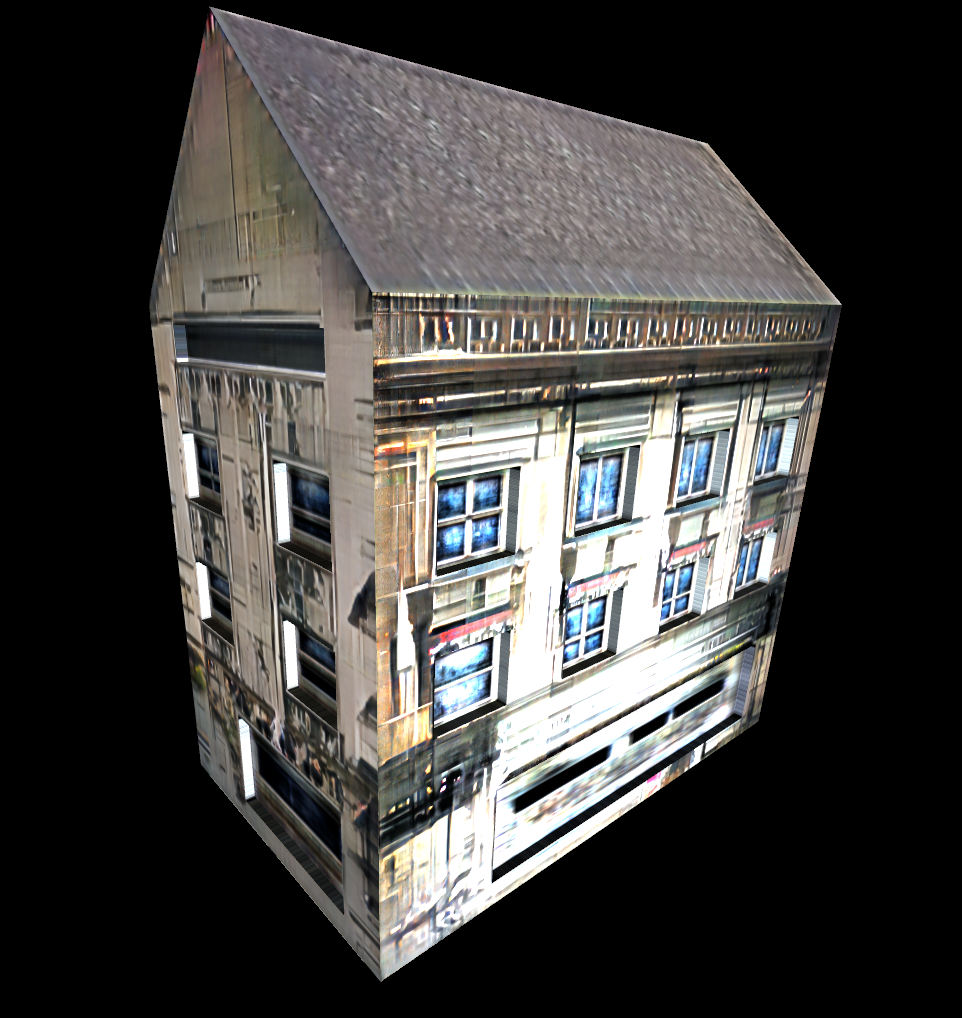
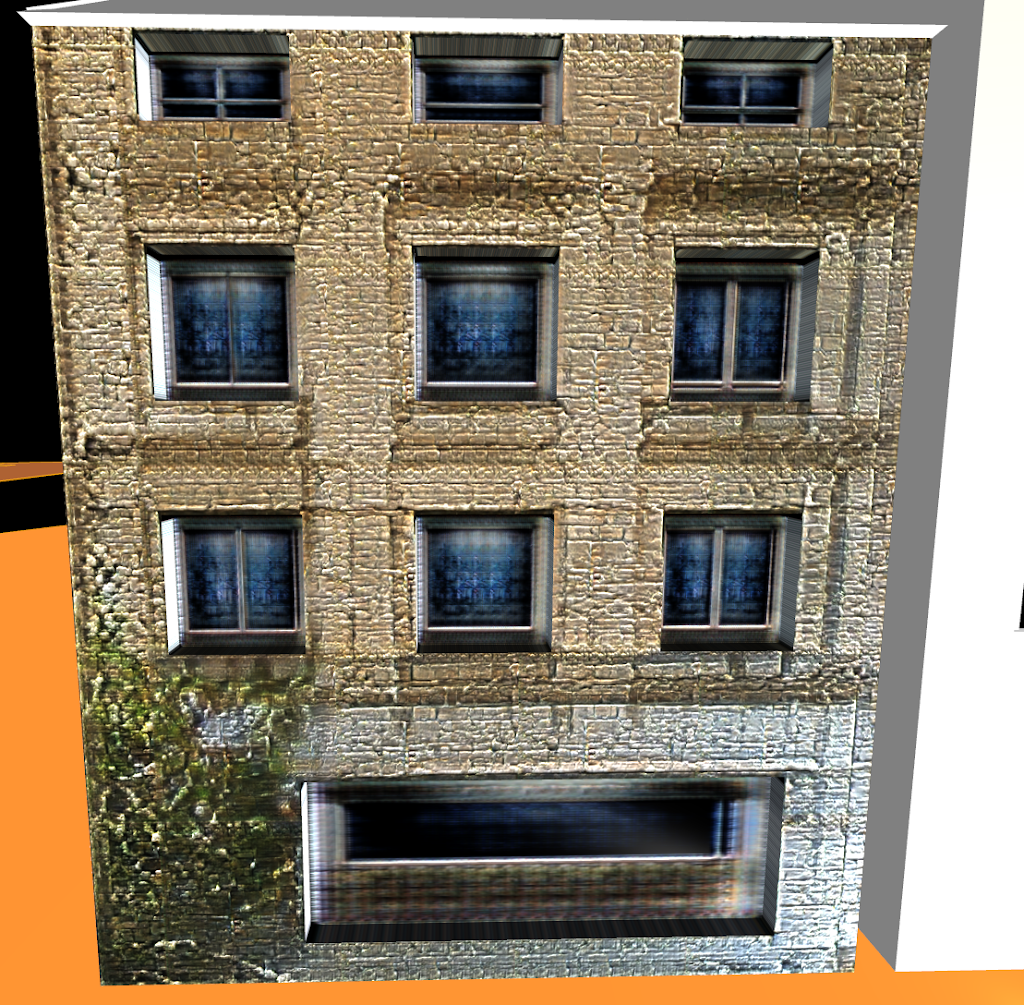
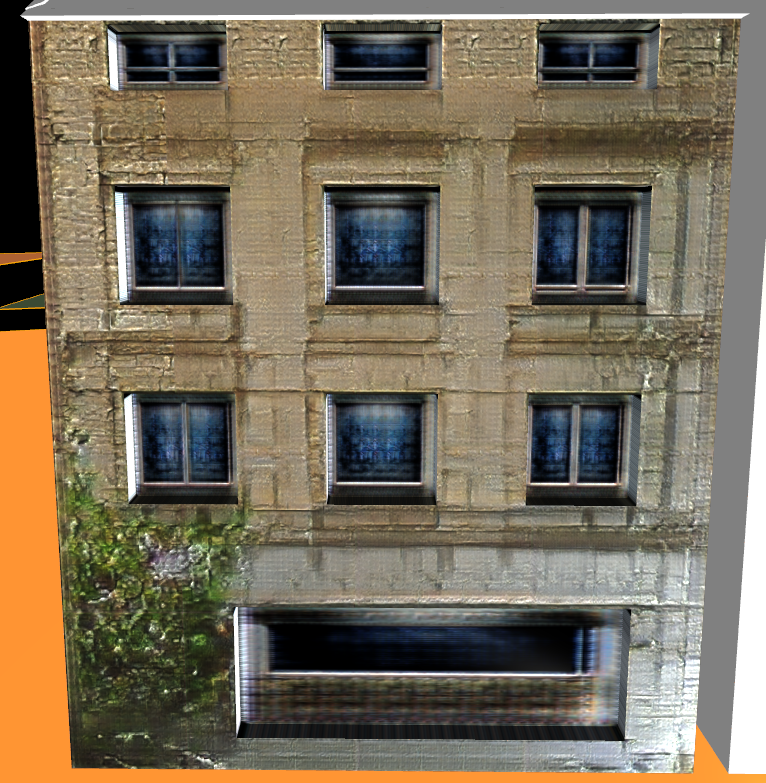
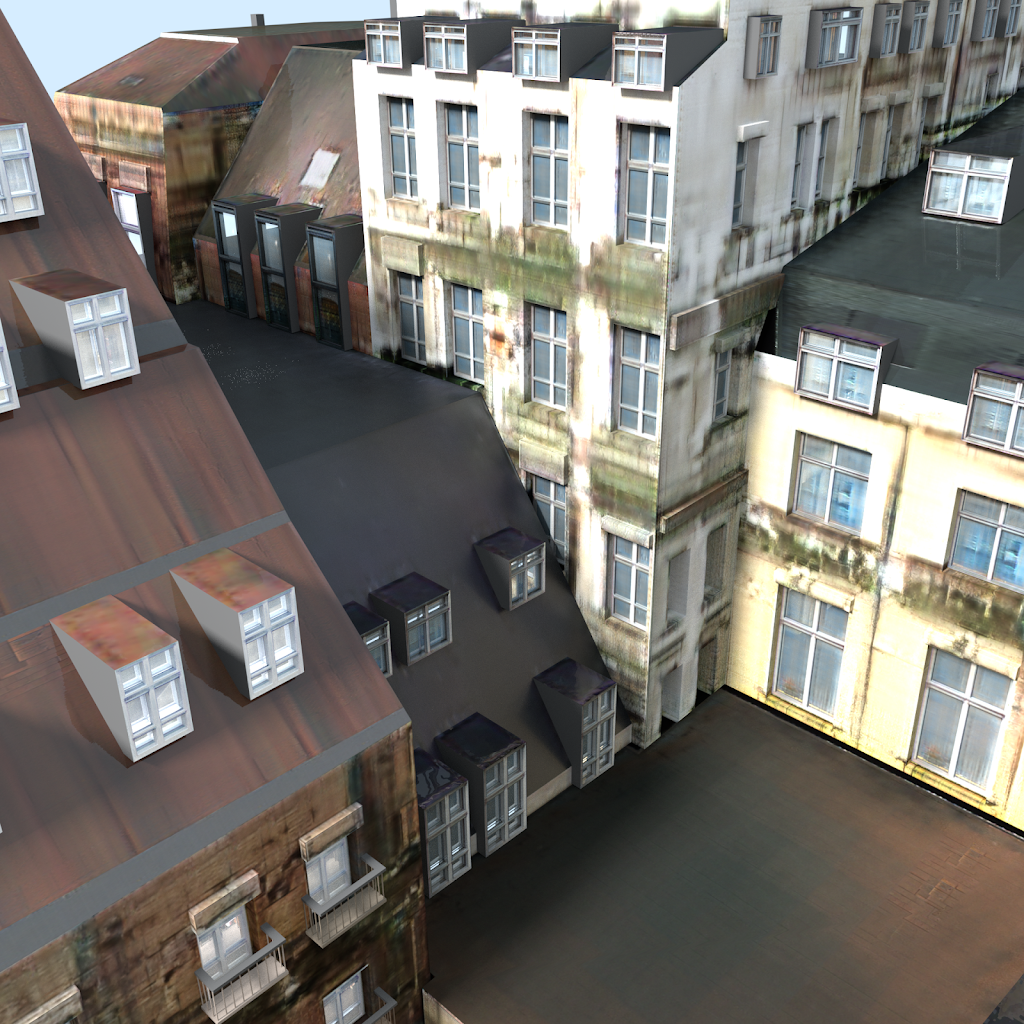
…into detailed geometry and textures:
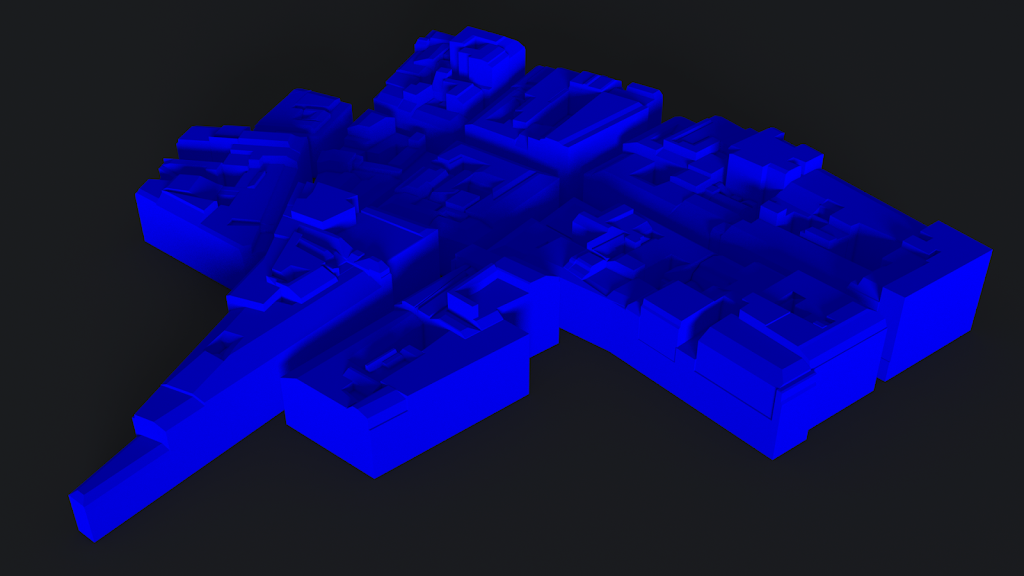
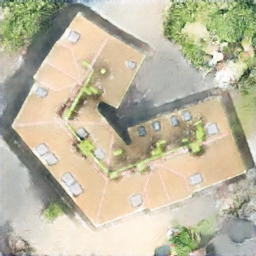
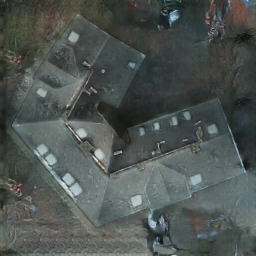
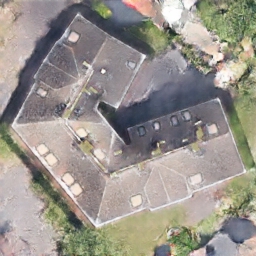
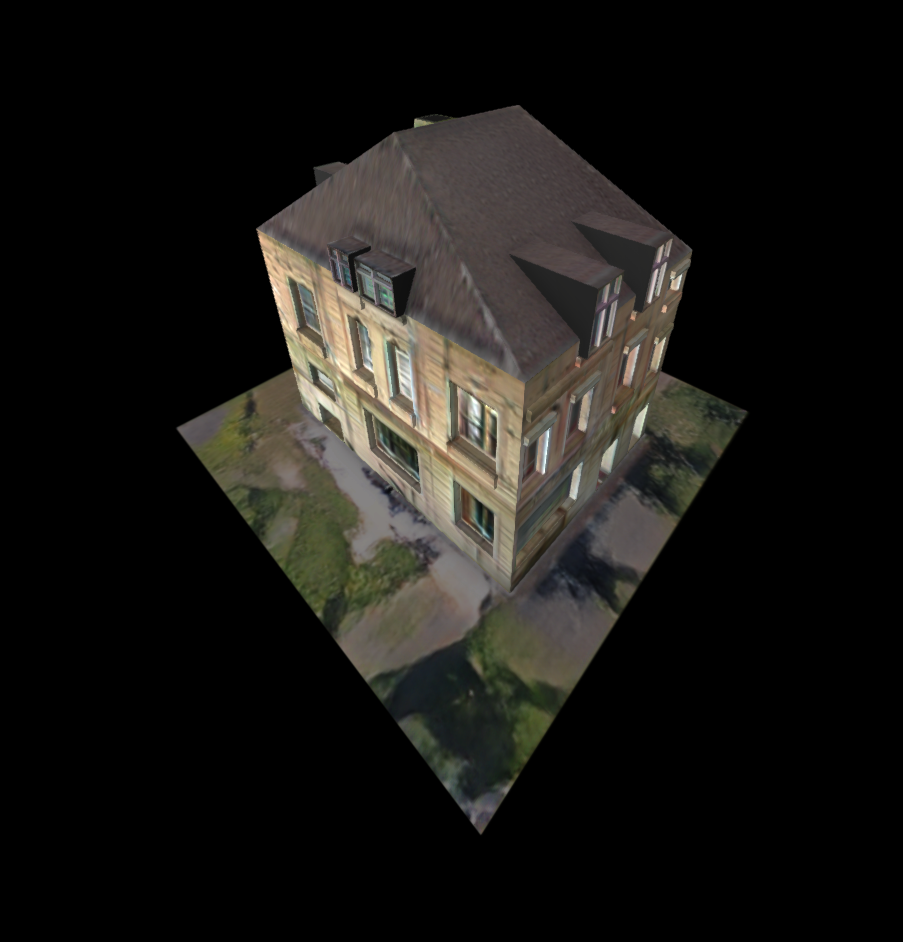
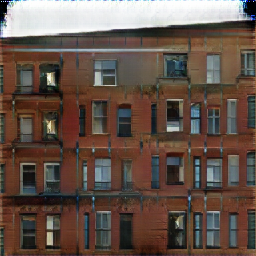
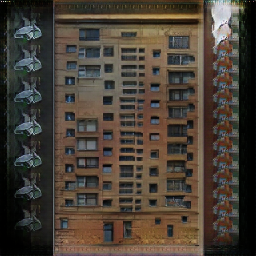
Every facade, roof and window has a unique texture (rgb, normal and specular maps) and layout. You can control the style generated by giving the system style-examples for each building part (roofs, facades…)
FrankenGAN uses a bunch GANs to greeble buildings. One GAN goes from blank facade to window locations, another from window locations to facade textures, another from facade textures to detailed facade labels (window sills, doors…), another from window-shapes to window labels etc…
A cynic might suggest was that all we did was solve every problem we encountered with another conditional GAN. An optimist might say that it shows how we might build a CityEngine that is entirely data-driven.

Let’s continue to look at some of the caveats to training so many GANs in the real world…
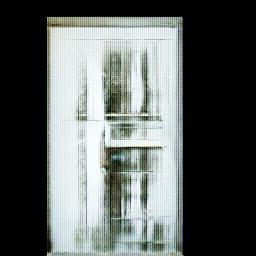
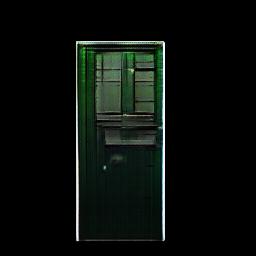
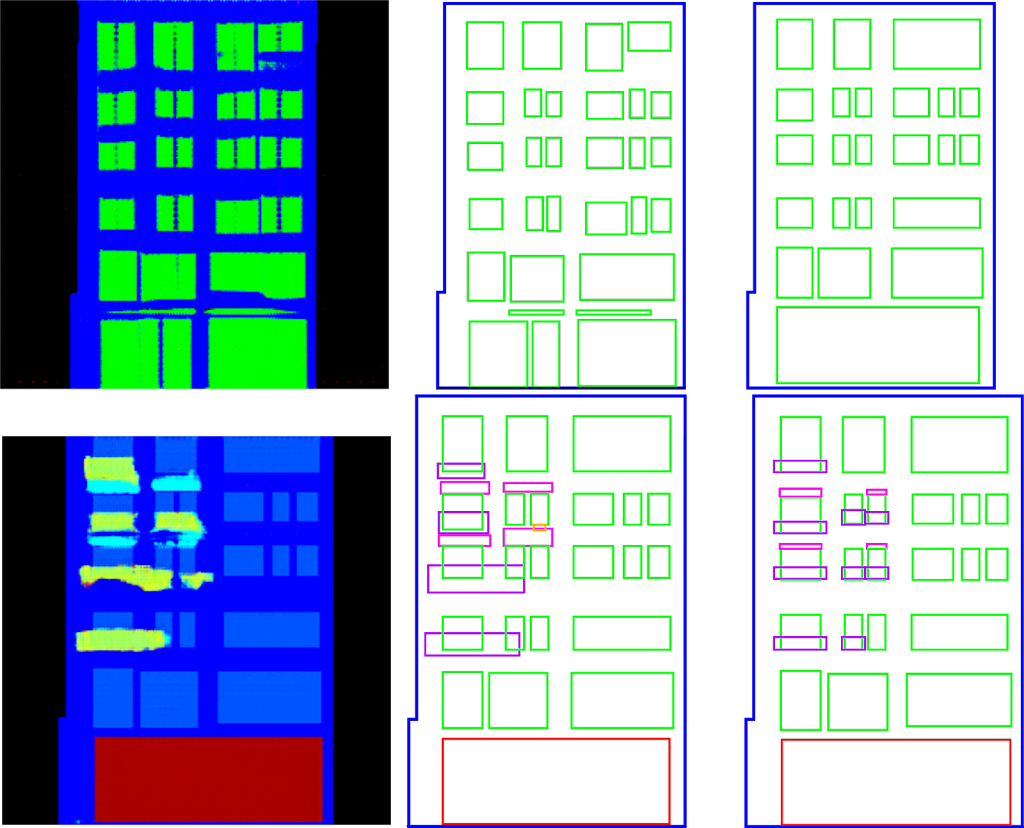
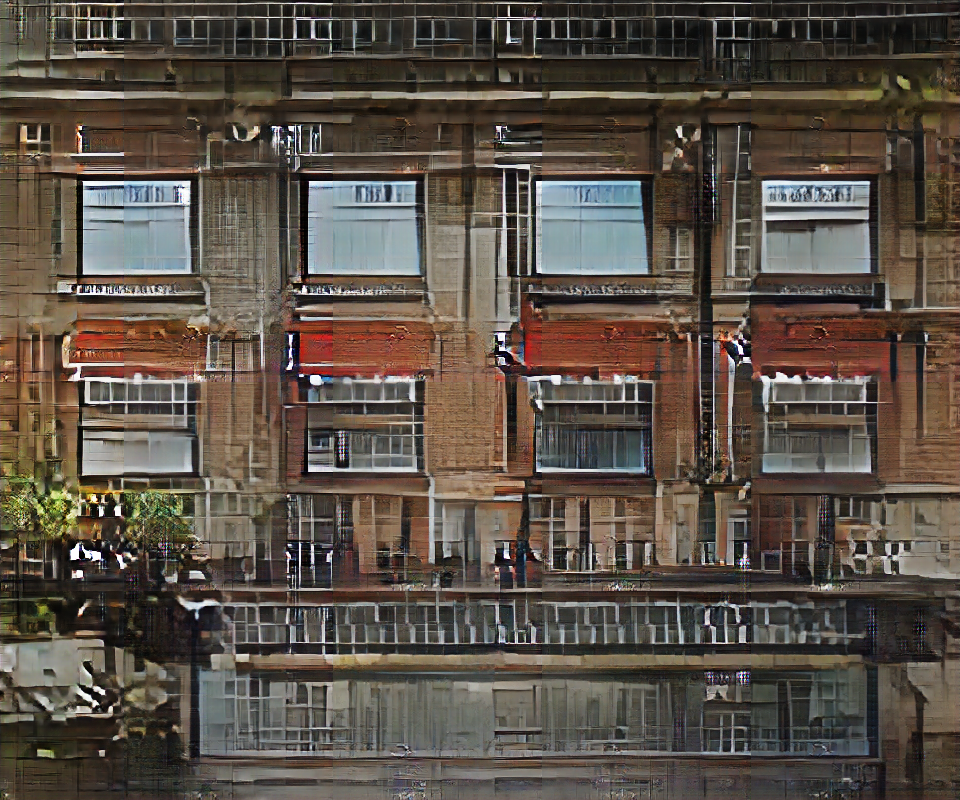
robots! Our training was plagued by “localised mode collapse” (aka Robots). In the following we see that the network hallucinates the same detail block again and again, often in the same location.
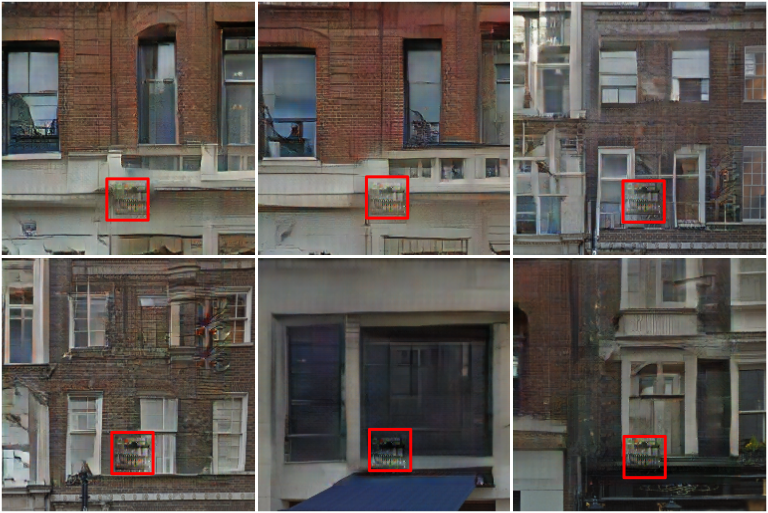
- Selecting the final training epoch. It seemed that it was never possible to completely get rid of robots, but it is possible to select which ones you get. By carefully selecting the training epoch to you, we found those with acceptable mode collapse. There were always some collapses.
- Dropping entries from the datasets. Our red-eyed robot seemed to be caused by red tail lights on cars at street level. Because we had relatively small datasets, it was possible to manually remove the worse offenders. Removing 1-5 entries seemed to make a difference sometimes.

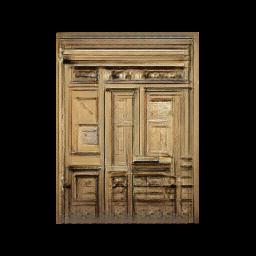
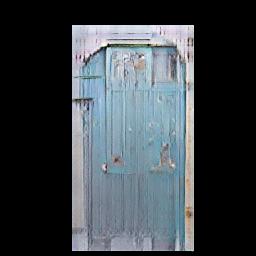
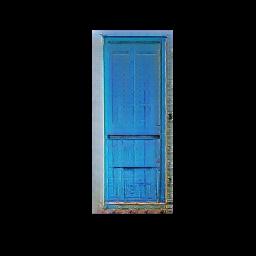
and output are our door pictures. So our training data was ~2000 pairs of red rectangles, and corresponding door textures.
Gathering this data is the major artistic process here. Imagine teaching child to draw a door – which examples would you show them? You want them to learn what a door is, but also want to understand the variety that you might see collection of doors. GANs tend to lock onto the major modes, and ignore the more eccentric examples. So if you want to see these there had better be a bunch of examples illustranting them. The bulk of the door dataset I put together is regular doors, with a few extra clusters around modern and highly ornate doors to keep thing interesting.
After 400 epochs training (200 + 200 at a decreasing learning rate, 10 hours of training) the results here. We had some nice examples:
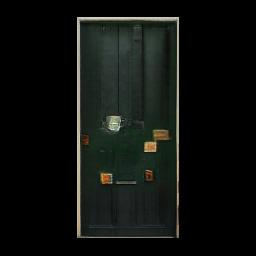
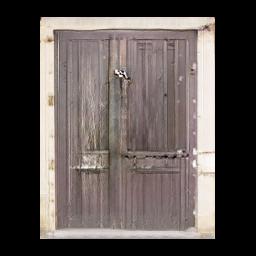
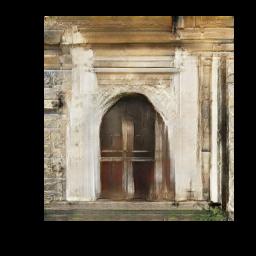
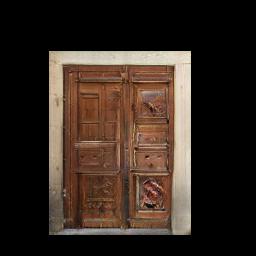
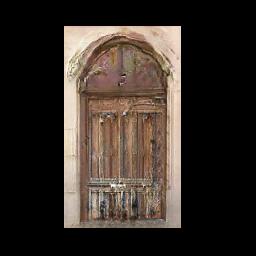
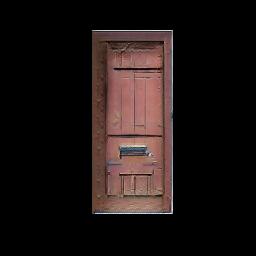
So the solution was to edit the dataset…to remove some wooden doors, and examples with arches and too much wall. In this case we’d shown our child too many strange examples, and they kept drawing them for us. Even though the dataset fell from 2000 examples to 1300 examples the results were generally better, for being more focused. Every second it’s possible to manually view and possibly delete multiple images, so this can be done in less thank an hour (although you get strange looks in the office, sitting in front of a monitor strobing door images, furiously hammering the delete key). Results here. Each training run was an overnight job, taking around 9 hours on my 1070.
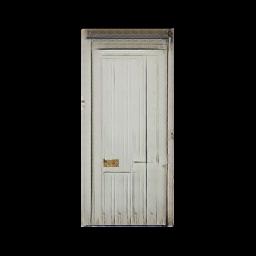
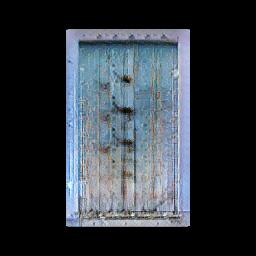
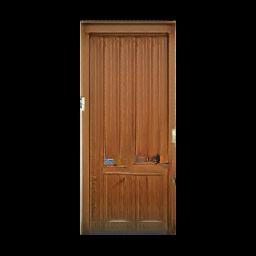
These are looking good, given that we don’t have labels (like the FrankenGAN windows and facades). But there were still some problems.
At 200 epochs the learning rate starts decreasing, however at this point the results weren’t good. So we’ll also bump the training to 300 epochs at constant learning rate, before decreasing for a further 300.
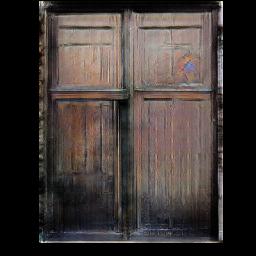
Being a GAN there are still some bad samples in there, but generally we have pushed the results in the direction that we need them to move.
As we see creating the dataset and training parameters is an involved iterative process that takes knowledge, artistic license, and technical ability to solve. I don’t pretend to have any of these things, but I can’t wait to see what real texture artists do with the technology.
So there are a many of artistic decisions to made when training GANs, but in a very different way to current texturing pipelines. Game artists are particularly well positioned to make use of GANs and deep-texturing approaches because they already have the big expensive GPUs that are used to train our networks. I typically use mine to develop code in the day, and to train at night.
Maybe future textures artists might be armed with hiking boots, light probes, and cameras rather than Wacoms and Substance; at least they will have something to do while their nets train.
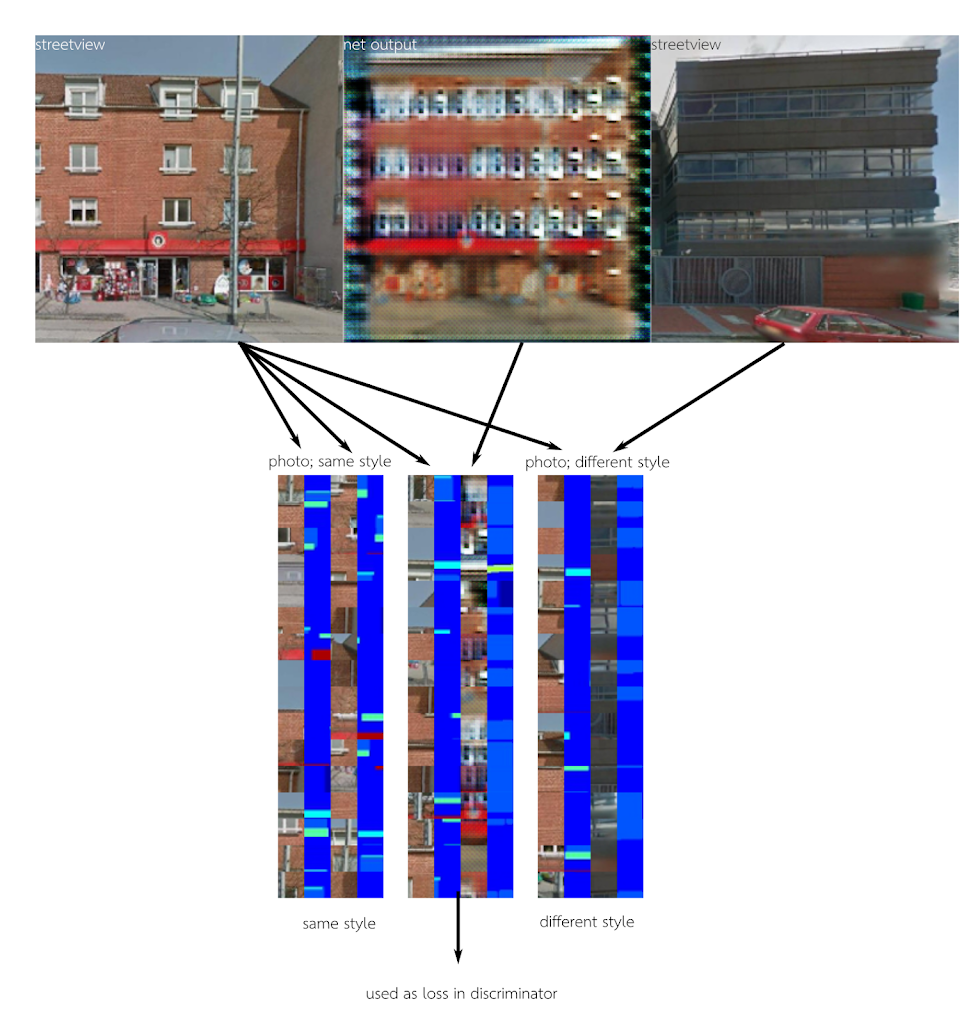
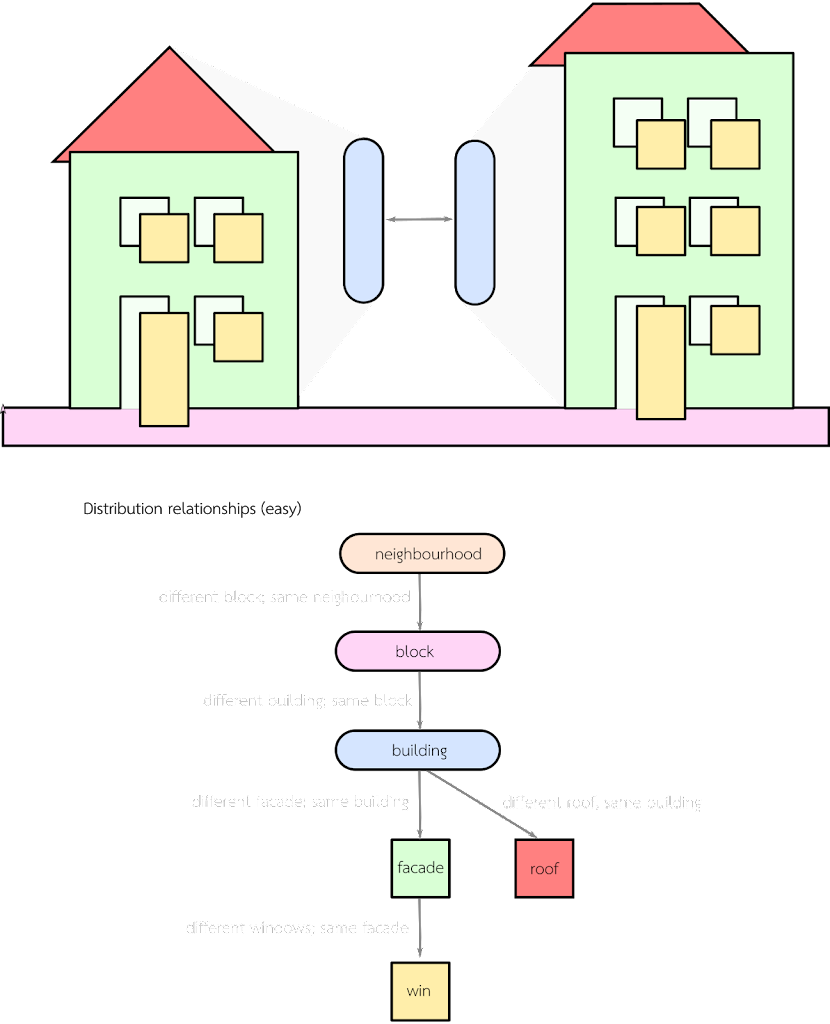
regularization (this did end up in the final paper thanks to the reviewers). Because we applied GANs to known domains (facades, windows, roofs…) we had a good idea of what should be created, and where. This allows us to tidy up (regularize) the outputs using domain priors (we know windows should be rectangular, so we force them to be rectangular). So we can alternate GANs which create structure (labels) and style (textures), which allows basic regularization to happen in between. Because the regulators are out-of-network, they don’t have to be differentiable…and could even be a human-in-the-loop. This gives a very reliable way to mold the chaotic nature of a GAN to our domain.
In addition, because the domain of the GANs used is tightly controlled (we do the facade, then the roofs, then the windows), it acts a inter-GAN form of regularisation. We only get facades on the front of buildings etc… Obvious, but very powerful when we have good models for your domain.
super super networks. Our super-resolution network was a little bit last minute and hacked together. It took the low resolution GAN outputs (256×256 pixels) and ran a super-resolution GAN to create an output of around 80 pixels per (real-world) meter. Unlike most existing super-resolution networks, we wanted the results to be inventive and to include a stylistic element (so some blurry low res orange walls become brick while on another building it could become stucco). The architecture had the advantage that it used a very similar pipeline to the other networks in the paper, but we had earlier plans to do something different.
The super-resolution style results presented in FrankenGAN were never very strong. The underlying colour tended to overwhelm the style vector to determine the results. This was a common theme when training the networks – the facade texture network had a tendency to select colour based on window distribution. For example missing windows in a column were frequent in NY (they were occluded by fire escapes), so the texture network loved to paint these buildings brick-red.
However, we generally overcame this problem with BicycleGAN to make the nets do something useful; we can clearly see some different styles given the same low-resolution inputs:
We see that variety in the types of network and domain (windows, facades, roofs) come together to create a very strong effect. This “variety synergy” seems to be enough to stop people looking too closely at any one texture result. We were somewhat surprised to get results looking this good just a week before the deadline (and then had to write a paper very quickly about them…).
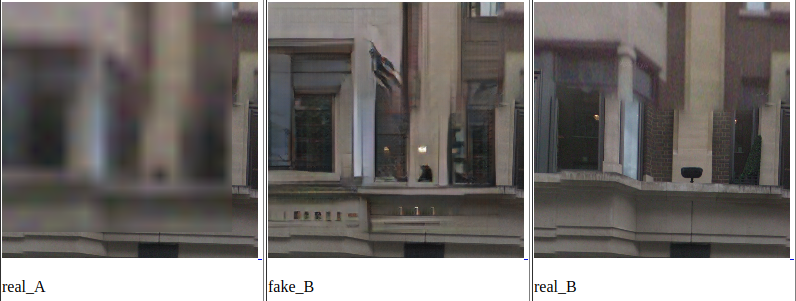
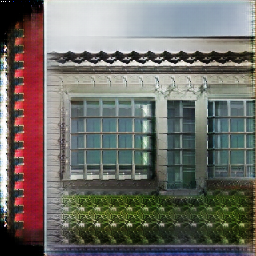
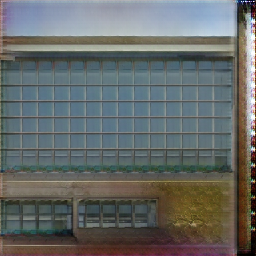
A nice side-result was using super-resolution to clean up images. Here we see an early super-resolution result (fake_B) removing the horizontal seams from Google Streetview images (real_B) by processing a heavily blurred image (real_A):
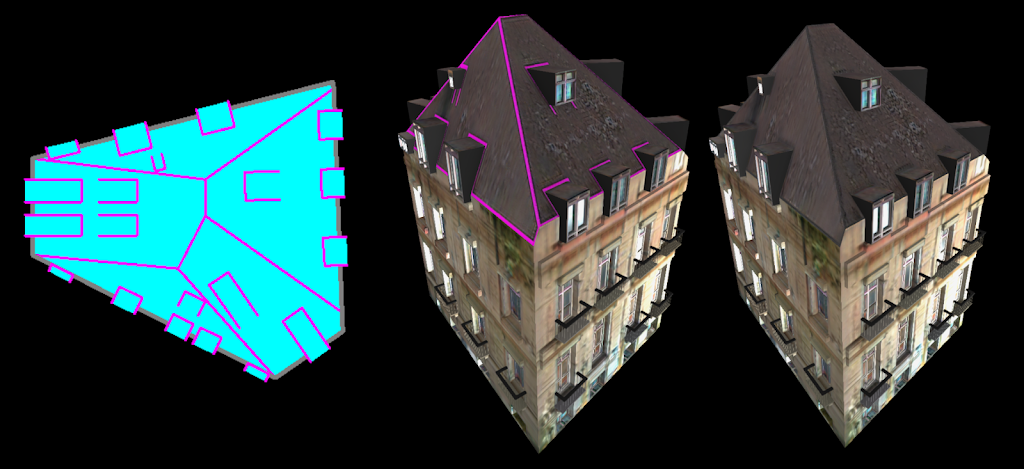
building skirts. A fun early result was generating the area around buildings (aka skirts). Here the labels (top left) were transformed into the other textures:
What is nice here is the variety in the landscape, and how it adapts to the lighting. For example, on an overcast day the surrounding area (bottom left) looks much less green than a similar texture in the “day”. More results. The final roof results in FrankenGAN lost all this “skirt” texture because of some of the network conditioning we applied.
tbh they don’t look great in 3D, they have no idea how to synchronise with the building geometry, so there are problems such as the footpaths not leading to doors.
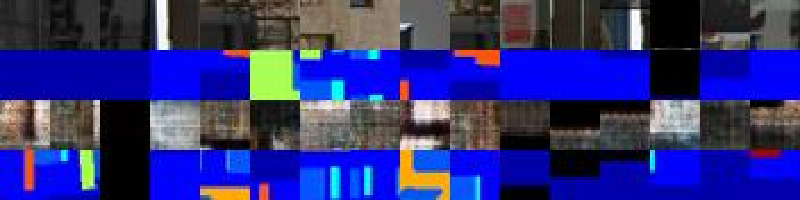
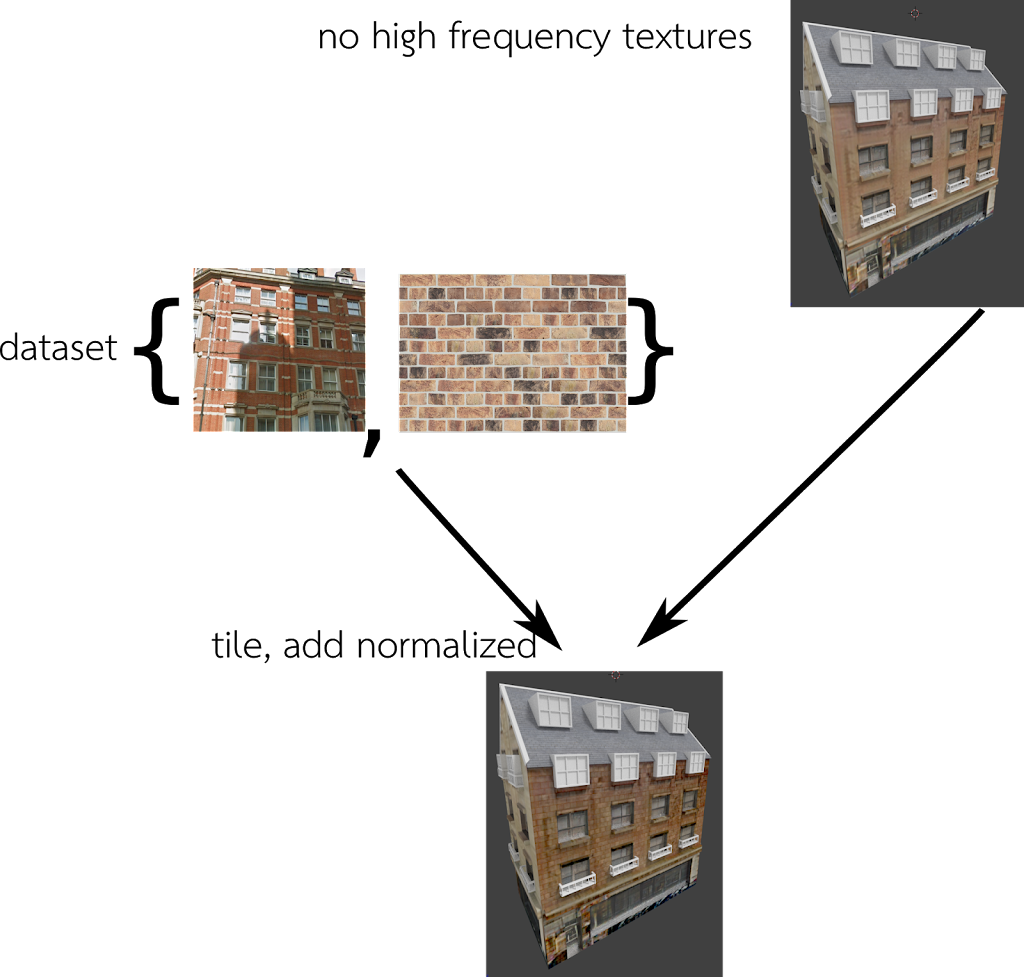
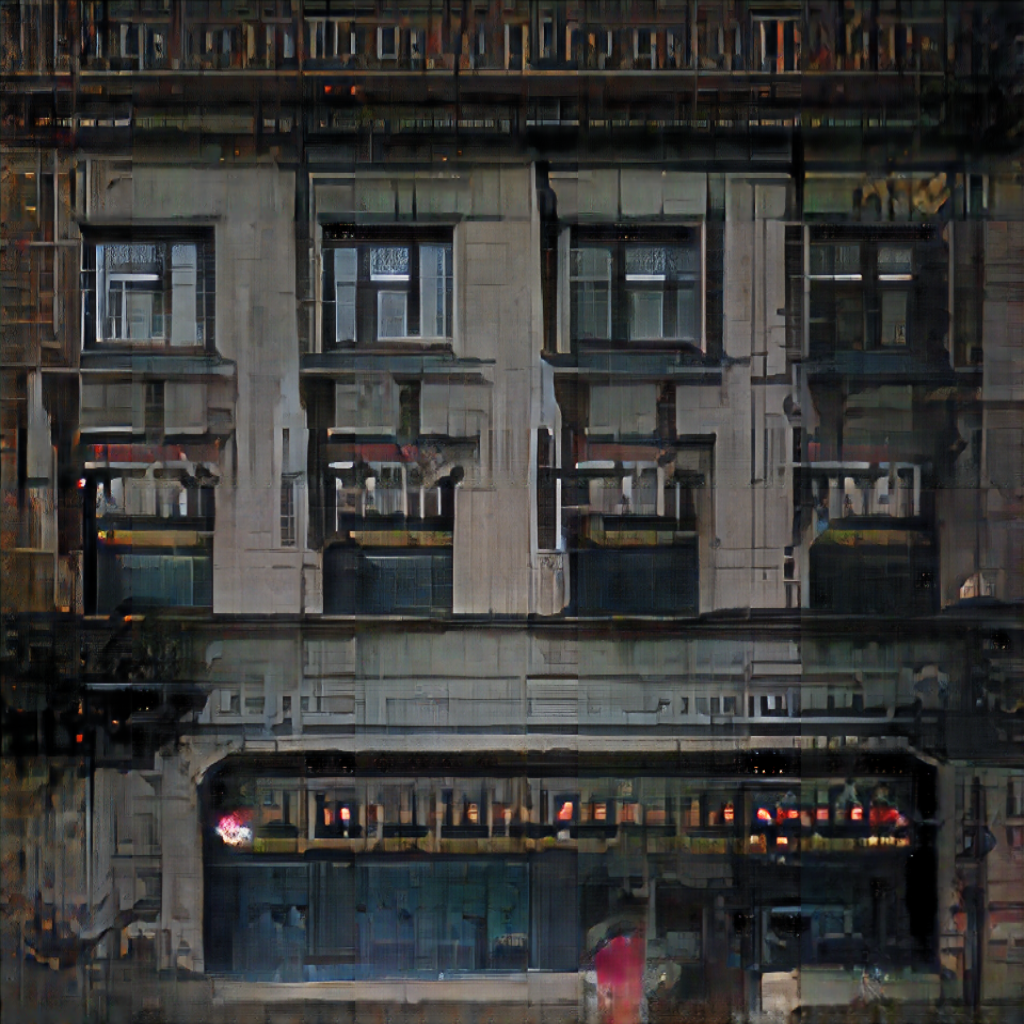
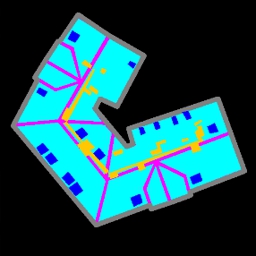
Even though the patches were randomly located, the results ended up with many repeating textures at the frequency of our patches.

While these results have “artistic” merit, there weren’t really what we were looking for. However, we note that that the window reconstruction, and repeating pattern (when close to our patch size) was very strong. Perhaps multi-scale patches might help in a future project [edit: CUT did something similar to this is 2020]…
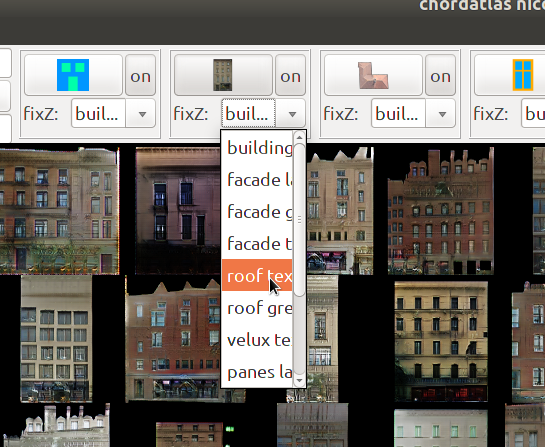
- a probabilistic bake-with: so that there’s a 10% the window style is baked at the block level, 30% chance at the building, and 30% at the facade level.
- geometrically driven bake-with: so facades which face the street might have a different style than those who face their neighbours.
where next? I had wanted to use GANs to create “stylistic” specular and normal maps, but never got around to it. In the end I hacked together something very quickly. This took the RGB textures, assumed depth-from-greyscale value, and computed the normal and specular maps from these. Use the layers menu in sketchfab to explore the different maps (yes yes, I know the roof is too shiny):